- AtoZ Cursive
- Cursive I
Cursive I: Tutorial & Printable Worksheets (Uppercase + Lowercase)
This page will teach you how to write cursive I clearly, with simple instructions and printable worksheets for handwriting practice.
How to Write I in Cursive
Cursive I is simple to write when you focus on clean lines and steady strokes for both letter forms. Follow simple steps to form both uppercase and lowercase cursive letters neatly.
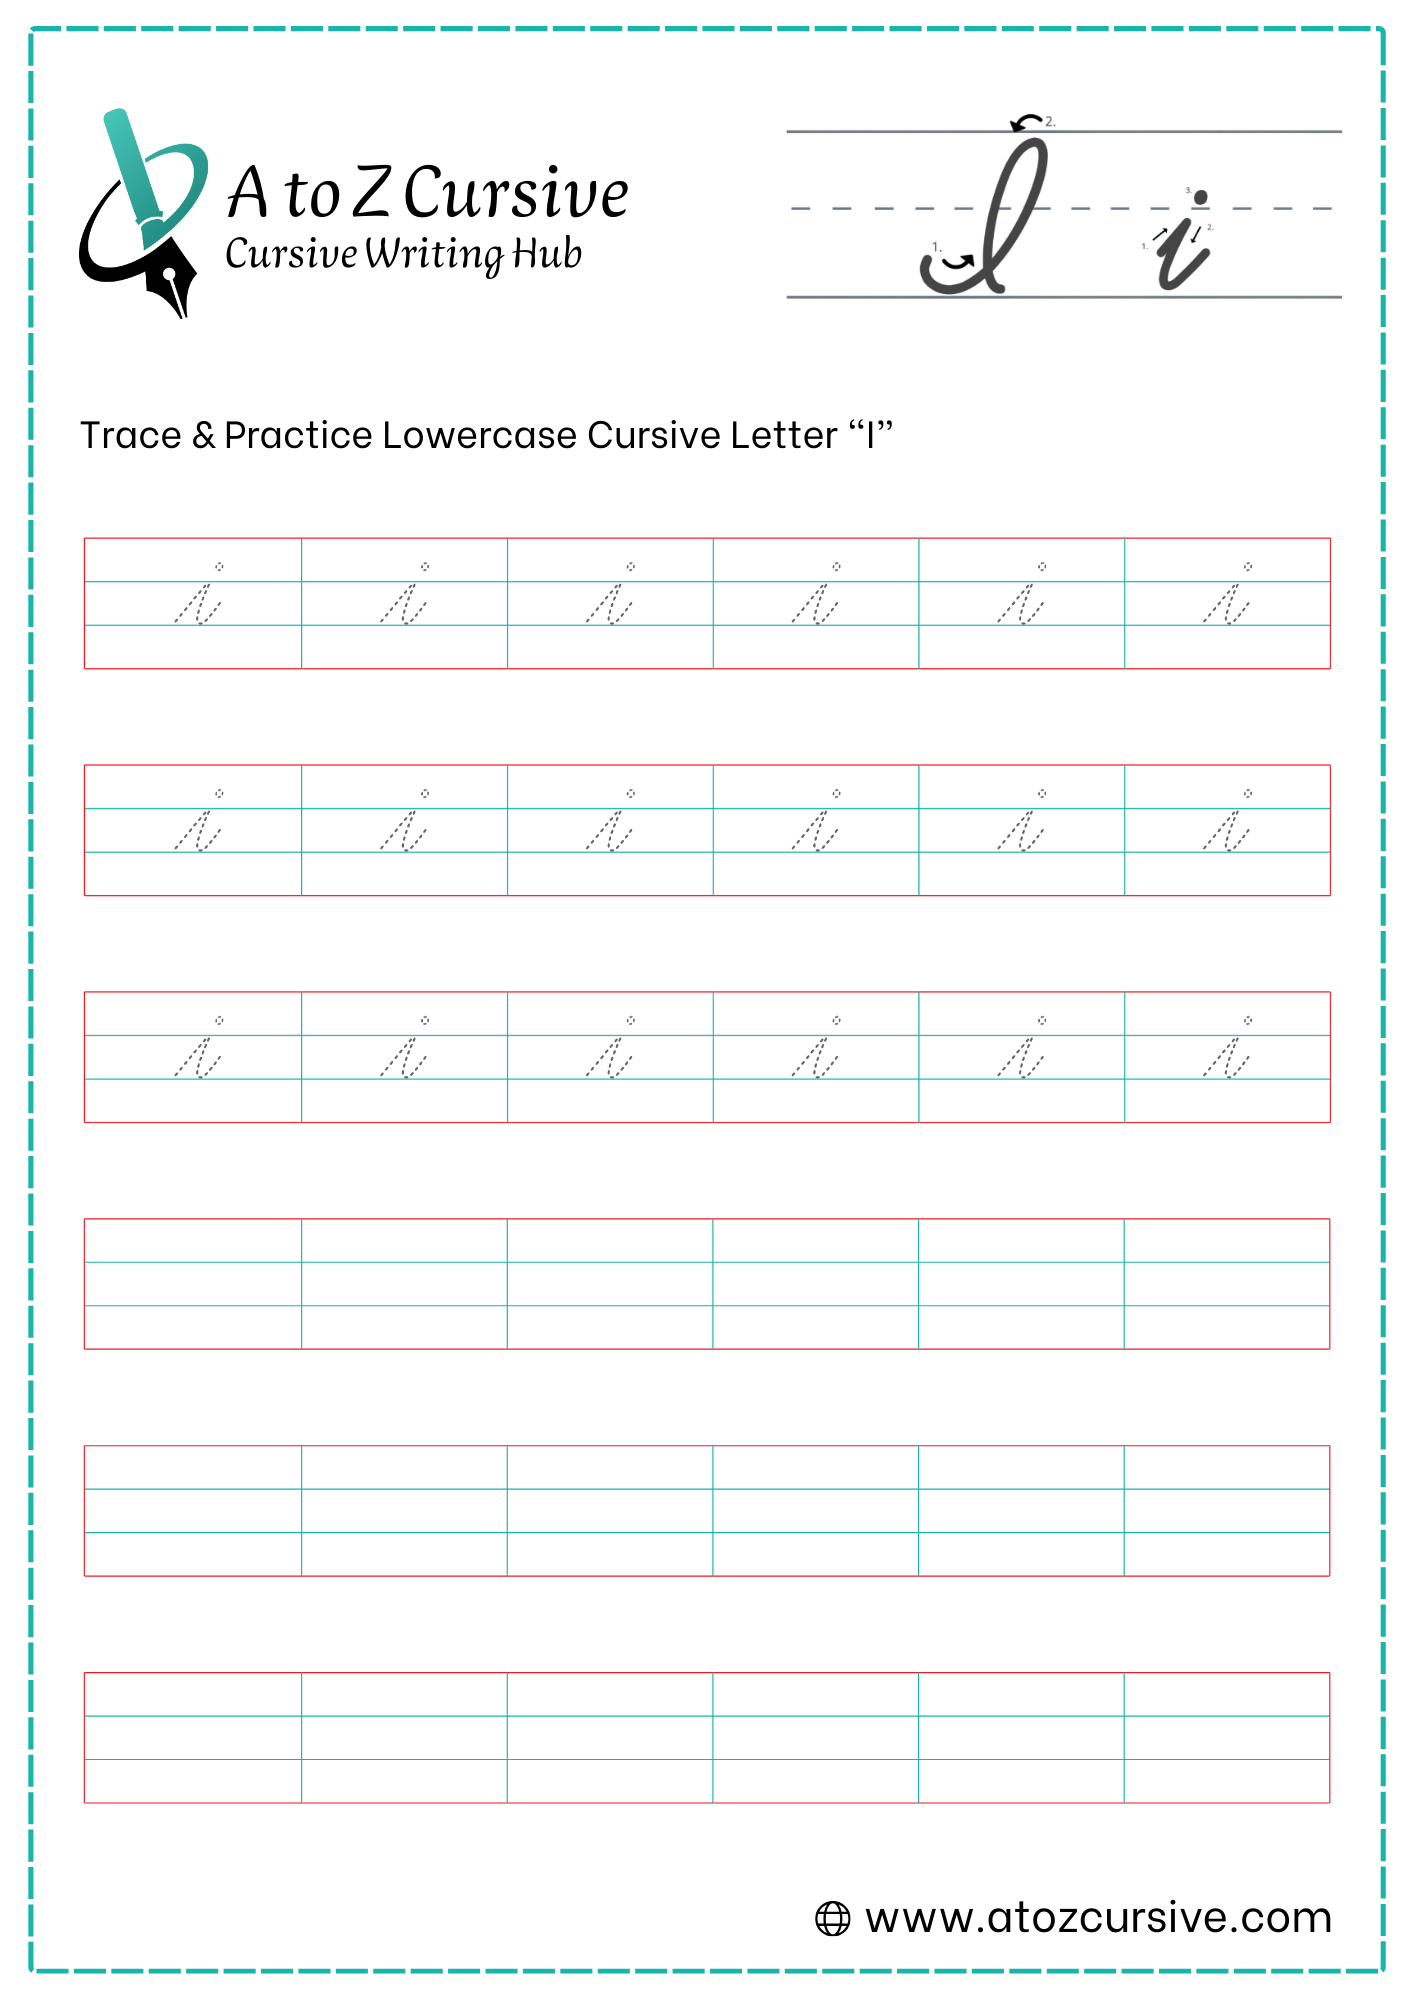
Lowercase Cursive I
-
Start at the bottom baseline.
-
Draw a slanted stroke up to the midline.
-
Without lifting your pen, trace back down the same line toward the baseline.
-
Curve gently away from the line to the right and flick up to create the connector tail.
-
Lift your pen and place a single, clean dot (not a circle) just above the midline, centered over the point.
Timing the Dot: Always finish the entire word first before going back to "i" to add the dot. This helps maintain your cursive flow.
Height: Keep the peak of the letter exactly at the midline.
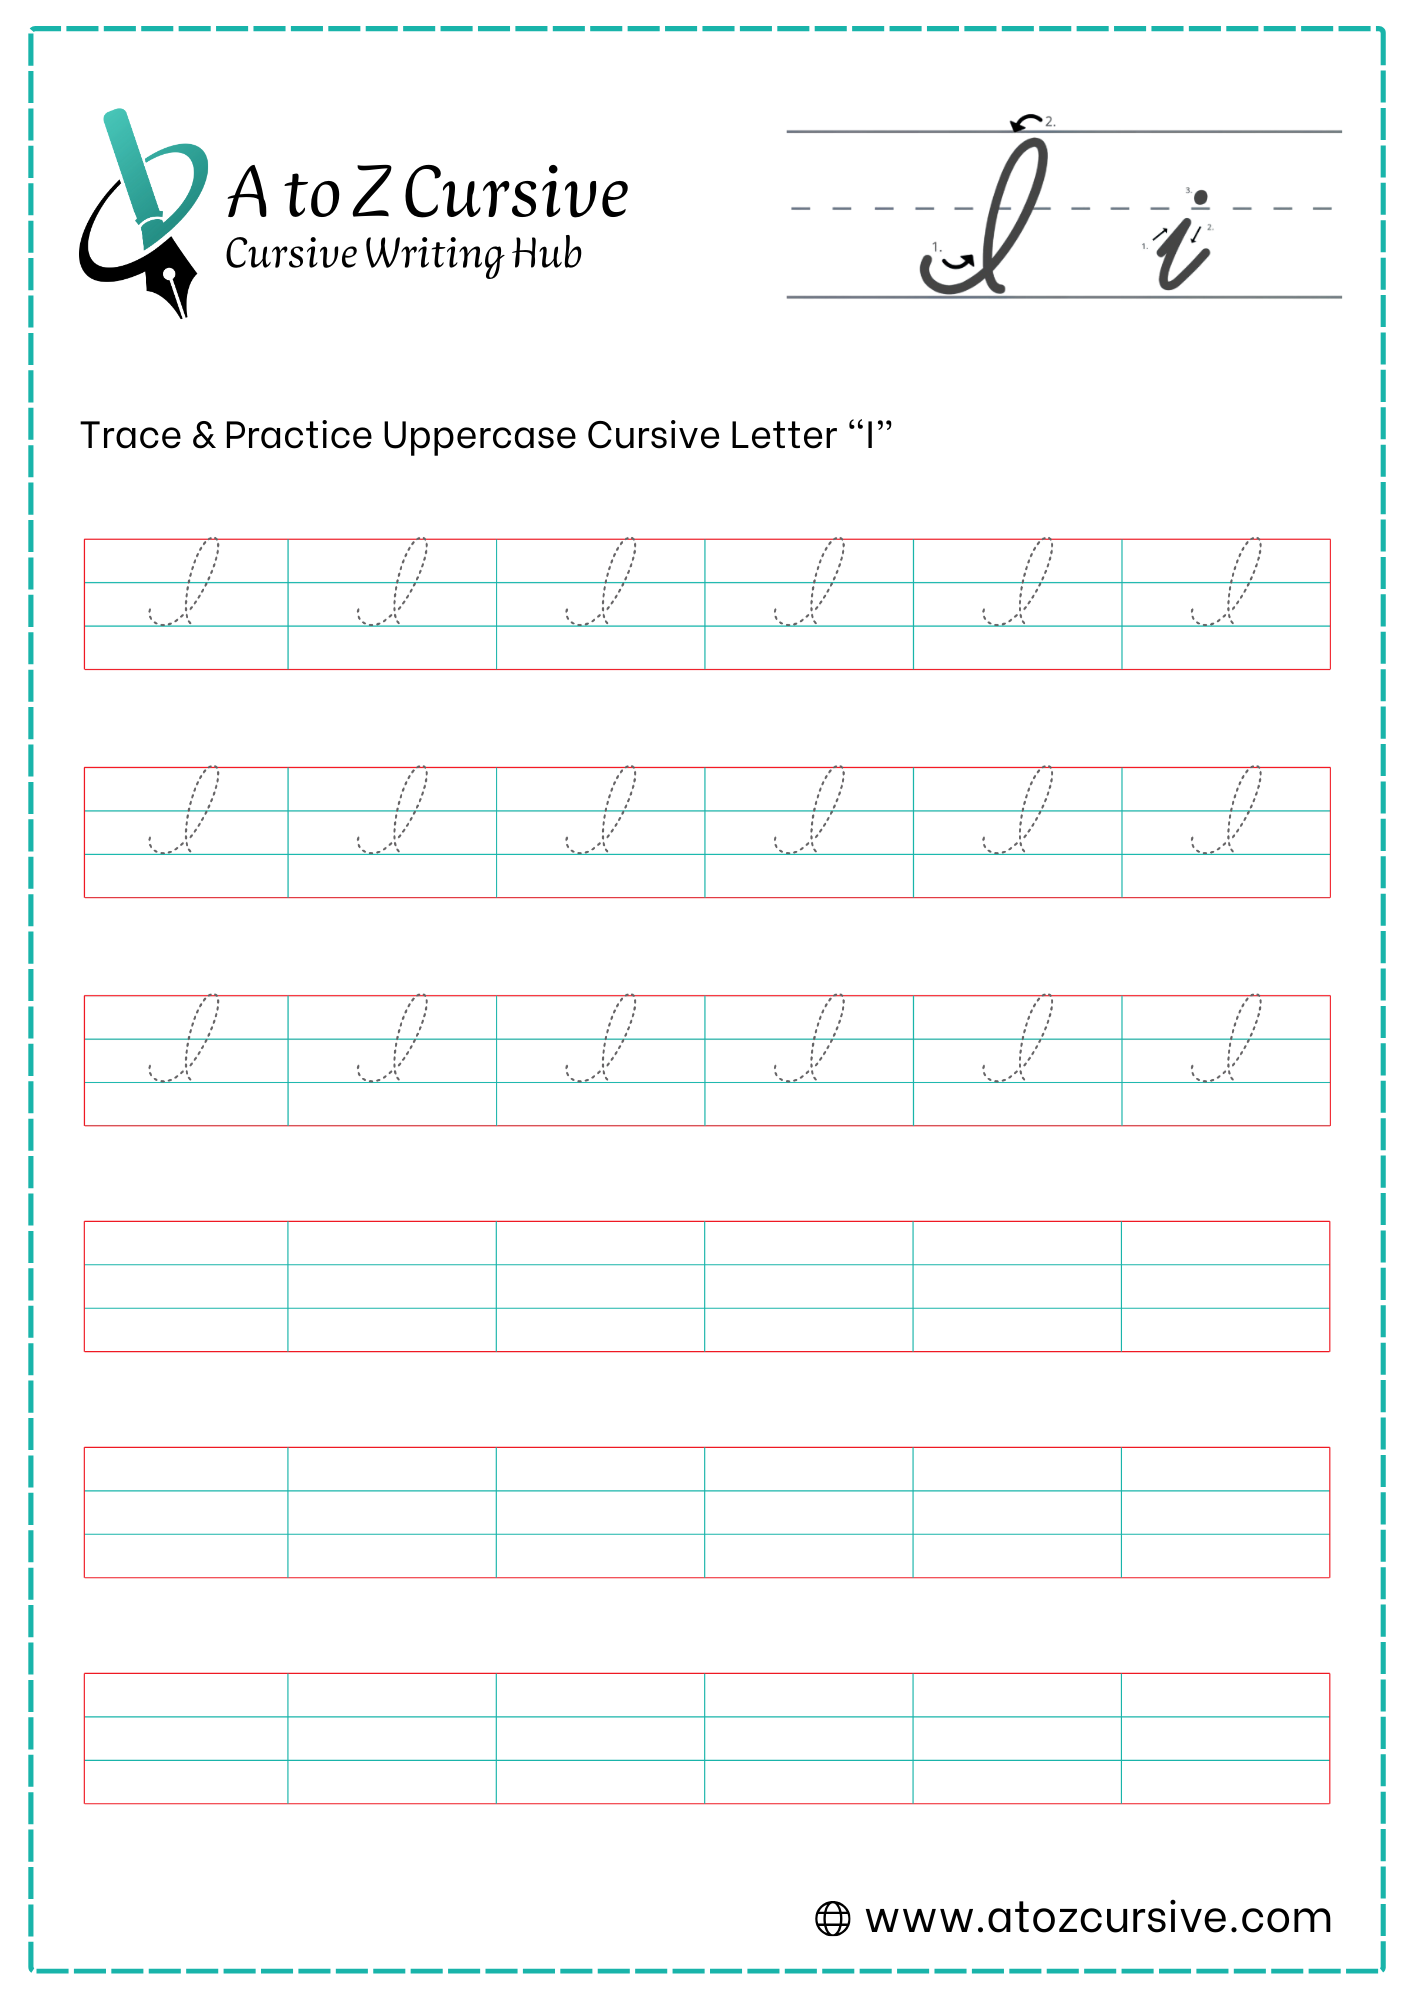
Uppercase Cursive I
-
The Start: Begin at the bottom baseline.
-
The Bottom Curve: Move your pen to the right along the baseline, then curve it back around to the left and upward.
-
The Big Loop: Continue that upward stroke all the way to the top headline, curving around to the left to form a large, tall oval.
-
The Stem: Pull your pen straight down from the top (slanted slightly) toward the baseline.
-
The Finish: End with a small curve to the left (like a little boat or a hook) that sits on the baseline.
The Direction: Remember that the very first move is to the right. Many beginners accidentally start by going left.
The "J" Difference: The Uppercase I stays on or above the baseline. If you pull the tail below the line, it becomes an Uppercase J.
Non-Connecting: In most traditional cursive styles, the Uppercase I does not connect to the next letter. You finish the "I," lift your pen, and start the next letter right next to it.
FAQs
Start at the baseline, draw a slanted line up to the midline, trace back down, add a small tail, then place a dot above.
The dot should sit just above the midline, centered over the letter. Use a small dot, not a circle.
No. Lowercase cursive i does not have a loop. It uses a straight stroke with a dot on top.
Add the dot after finishing the whole word. This helps keep your cursive writing smooth and flowing.
The stroke should reach only the midline, not the top line. Keeping the height correct improves letter balance.
Uppercase cursive I starts at the baseline, forms a tall loop to the top line, then comes straight down with a small hook.
Usually no. In most cursive styles, the uppercase I is a non-connecting letter.
Cursive I stays on or above the baseline. Cursive J goes below the baseline with a longer tail.
Yes. Tracing worksheets help beginners learn correct strokes, spacing, and control.